Master Beer Can Chicken: Juicy Meat & Crispy Skin Every Time
There are few culinary delights as satisfying as a perfectly roasted chicken – golden, crispy skin giving way to succulent, flavorful meat. Among the myriad ways to achieve this, beer can chicken stands out as a true backyard grilling legend. More than just a quirky party trick, this technique is a proven method for delivering an unbelievably juicy whole chicken with irresistibly crispy skin, every single time. Whether you're a seasoned pitmaster or firing up the grill for the first time, mastering this recipe will elevate your outdoor cooking repertoire and impress anyone lucky enough to share a meal with you.
Forget the myth that beer can chicken is just a gimmick; it's a fantastic fusion of science and simplicity. Our comprehensive guide will walk you through every step, from selecting the right bird to achieving that mouth-watering finish. Get ready to transform a humble chicken into a show-stopping centerpiece that promises incredible flavor and texture with minimal fuss.
The Science Behind the Sizzle: Why Beer Can Chicken Works Wonders
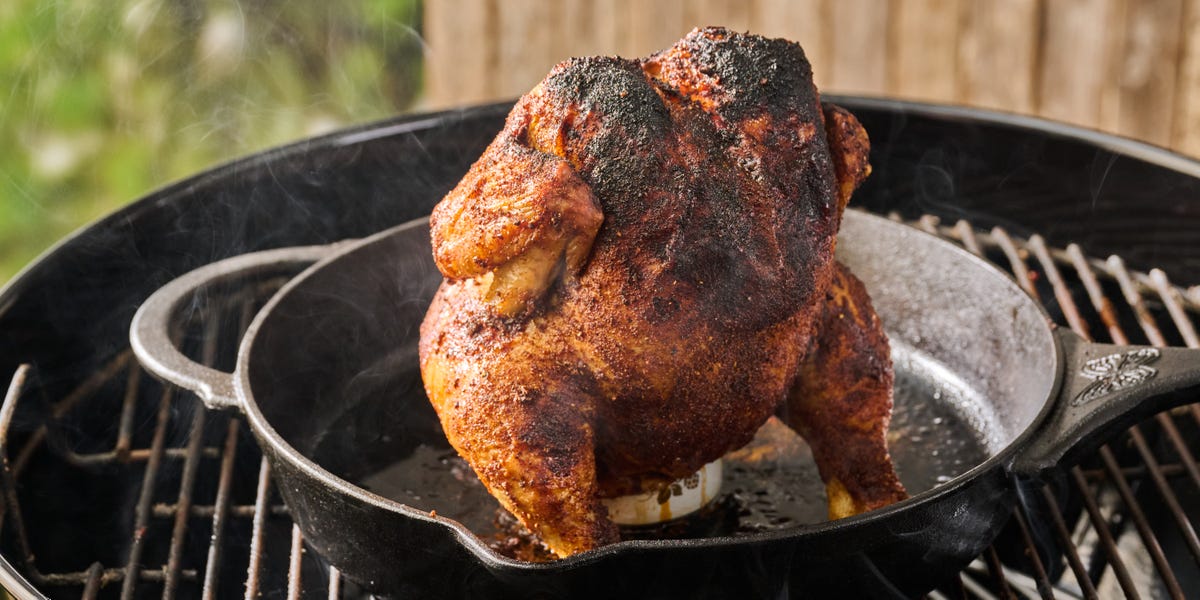
At its heart, the magic of beer can chicken lies in a clever combination of steam and vertical roasting. It's a culinary ballet designed to maximize moisture and crispness simultaneously. As the beer (or chosen liquid) inside the can heats up on the grill, it transforms into steam. This steam then permeates the chicken from the inside out, essentially creating an internal basting system that keeps the meat incredibly moist and tender. It’s this continuous infusion of moisture that prevents the chicken from drying out, a common pitfall with traditional roasting methods.
Simultaneously, the vertical posture of the chicken is a game-changer for achieving that coveted crispy skin. Standing upright, the chicken is exposed to heat more evenly around its entire surface. This allows hot air to circulate freely, rendering the fat efficiently and promoting even browning. As the fat drips away, it doesn't pool around the chicken, which can lead to soggy skin. Instead, it falls into a drip pan, ensuring a beautifully crisp, golden exterior. While some debate the extent to which the beer's flavor penetrates the meat – most culinary experts agree it's minimal – its primary role as a steam generator for internal moisture is undeniable. The aluminum can itself serves a dual purpose: providing a stable base for the chicken to stand on and acting as the vessel for this crucial steam. For a deeper dive into the mechanics, read more about Unlock Juicy Perfection: The Beer Can Chicken Technique Explained.
Selecting Your Star & Setting the Stage: Ingredients & Equipment
Success with beer can chicken begins long before it hits the grill. Careful selection of your ingredients and proper equipment setup are paramount.
The Chicken:
- Size Matters: Opt for a fresh, whole chicken weighing between 4 and 5 pounds. This size generally fits perfectly over a standard 12-ounce beer can and cooks most evenly. Larger birds may struggle for stability and require significantly longer cooking times, potentially leading to dryness.
- Skin Integrity: Choose a chicken with intact skin, free from tears or punctures. The skin acts as a protective barrier, helping to retain precious moisture during the long cooking process and is essential for achieving that glorious crispness.
- Preparation: Before seasoning, always pat the chicken thoroughly dry with paper towels. Excess moisture on the skin is the enemy of crispiness.
The Beer (or Alternative):
- Choice Brews: While "any beer" will technically work, fuller-bodied lagers, ales, or even stouts tend to perform better than light beers. Their higher moisture content means they evaporate more slowly, providing a consistent steam bath for longer.
- Beyond Beer: Don't drink beer? No problem! You can easily substitute with chicken broth, apple cider, or even a can of soda like root beer or cola for a unique, subtly sweet flavor profile. The key is the liquid itself, not necessarily the alcohol. Ensure you pour out about half of the can's contents before placing the chicken on it. The other half is, of course, for the cook to enjoy!
The Rub & Seasoning:
This is where you infuse your beer can chicken with irresistible flavor. While a basic rub of salt, pepper, paprika, garlic powder, and onion powder is excellent, feel free to experiment.
- Basic Blend: 1 tbsp paprika, 1 tbsp brown sugar, 1 tbsp salt, 1 tsp black pepper, 1 tsp garlic powder, 1 tsp onion powder, ½ tsp cayenne pepper (optional).
- Application: Crucially, brush the entire chicken with a light layer of olive oil or melted butter first. This helps the seasoning adhere beautifully and acts as a binder, further promoting crispy skin development. Apply the rub generously, both inside the cavity and all over the exterior.
Essential Equipment:
- Grill Setup: You'll need a grill capable of maintaining a consistent indirect heat.
- Charcoal Grills: Bank your coals to the sides, leaving the center clear.
- Gas Grills: Turn on the outer burners, leaving the center burner(s) off.
- Drip Pan: Absolutely essential! Place an aluminum foil pan directly under where the chicken will sit, positioned on the unlit section of your grill. This catches dripping fat, preventing flare-ups that can burn your skin and create acrid smoke. It also makes cleanup a breeze.
- Meat Thermometer: Your most vital tool. A reliable leave-in digital thermometer is ideal for monitoring internal temperatures without constantly opening the grill lid.
- Beer Can Chicken Roaster (Optional): While a standalone beer can works, dedicated roaster stands provide extra stability and often have a tray to hold the can, making transfer easier. If you're looking for consistent results, this might be a worthwhile investment. For a guide to foolproof results, check out Foolproof Beer Can Chicken: Achieve Juicy Meat & Golden Crispy Skin.
The Art of Grilling: Technique for Perfect Beer Can Chicken
With your ingredients and equipment ready, it's time to bring your beer can chicken to life on the grill.
Preparation Steps:
- Chicken Prep: Remove the chicken from its packaging, remove any giblets from the cavity, and rinse it thoroughly under cold water. Pat it completely dry with paper towels – this step is critical for crispy skin! Trim any excessive fat, especially around the cavity opening.
- Seasoning: Lightly brush the entire chicken with olive oil or melted butter. Generously apply your chosen spice rub all over the exterior and inside the cavity. Don't be shy!
- Can Prep: Open a 12-ounce can of beer (or chosen liquid) and pour out (or drink!) about half of the contents. If desired, you can add aromatics like a clove of garlic, a sprig of rosemary, or a few peppercorns into the can for subtle fragrant notes.
- Positioning: Carefully lower the chicken cavity over the half-full can. The chicken's legs should act as a tripod with the can, providing a stable base. Ensure it stands upright and is well-balanced.
Grill Setup & Temperature Control:
- Preheat: Set up your grill for indirect heat cooking and preheat it to a consistent temperature of 350-375°F (175-190°C). This medium-indirect heat is optimal for slow, even cooking that crisps the skin without burning it.
- Drip Pan Placement: Place your drip pan on the unlit section of the grill, directly under where the chicken will sit.
Cooking Process:
- Load the Grill: Carefully transfer the chicken on its can to the grill, placing it upright over the drip pan, away from direct heat.
- Cook Time: Close the grill lid and resist the urge to peek! Every time you open the lid, you lose valuable heat and extend the cooking time. A 4-5 pound chicken will typically cook for 1.5 to 2 hours, but always rely on temperature, not time.
- Monitor Temperature: Insert your meat thermometer into the thickest part of the thigh (without touching the bone) and another into the thickest part of the breast. The chicken is done when the internal temperature reaches 165°F (74°C) in the breast and 180°F (82°C) in the thigh. The higher temperature for the thigh helps render its fat completely, leading to a more tender texture.
- Visual Cues: In addition to temperature, look for a beautiful golden-brown, crispy skin.
Resting & Serving:
Once the chicken reaches the desired internal temperature, it's crucial to let it rest. This allows the juices, which have migrated to the center of the bird during cooking, to redistribute throughout the meat, resulting in an even juicier final product.
- Careful Removal: Using sturdy tongs and oven mitts, carefully remove the chicken (still on the can) from the grill and place it on a cutting board or platter. Be extremely cautious – the can and its contents will be scalding hot!
- Rest: Tent the chicken loosely with foil and let it rest for 10-15 minutes.
- Remove Can: After resting, carefully lift the chicken off the can. Some people find it easier to use a pair of tongs to hold the can while tilting the chicken off. Discard the can and its hot liquid safely.
- Carve & Enjoy: Carve your perfectly roasted beer can chicken and prepare for an explosion of flavor and texture!
Safety First & Troubleshooting Tips
While beer can chicken is generally safe, a few precautions and troubleshooting tips can ensure a smooth grilling experience:
- Flare-Ups: Always use a drip pan to catch fat and prevent grease fires. If you do experience a flare-up, close the grill lid to cut off oxygen and move the chicken to a cooler part of the grill until it subsides.
- Hot Can Handling: The can and its liquid will be incredibly hot. Use thick oven mitts or heat-resistant gloves and sturdy tongs for safe removal and handling. Never attempt to remove the can immediately after taking the chicken off the grill.
- Chicken Toppling: If your chicken feels wobbly on the can, ensure the legs are spread wide enough to form a stable tripod. A dedicated chicken stand can significantly improve stability.
- Skin Not Crispy Enough? Ensure you thoroughly patted the chicken dry before seasoning. Check that your grill temperature was consistent, and you maintained indirect heat. Sometimes, removing the drip pan for the last 15-20 minutes (if safe to do so) can enhance crisping, but watch carefully for flare-ups.
- Meat Dry? The primary culprit is often overcooking. Invest in a reliable meat thermometer and pull the chicken as soon as it hits the target internal temperatures. Also, ensure your grill maintains a consistent temperature to prevent scorching and drying.
Conclusion
Mastering beer can chicken is a rite of passage for any grilling enthusiast, promising not just a meal, but an experience. By understanding the simple science behind the steam and vertical roasting, carefully selecting your ingredients, and following our detailed technique, you can consistently achieve a chicken that boasts unbelievably juicy meat and perfectly crispy, flavorful skin. It’s a method that delivers maximum impact with minimal fuss, making it perfect for casual weeknight dinners or a show-stopping centerpiece at your next BBQ party. So fire up that grill, crack open a can, and get ready to enjoy the succulent rewards of your perfectly mastered beer can chicken!
